5 Spooky Halloween Dessert Recipes To Prepare This Fall
Looking for some simple but delicious Halloween dessert recipes? In this article, we offer you some of the desserts to make your Halloween night even more spooktacular. From spider web cake to meringue bones, there is a scary-sweet treat for everyone. They may appear creepy to look at, but they won’t disappoint your frightful spirit at all!
All these Halloween dessert recipes are frighteningly fantastic to make your All Hallows Eve amazing. Both in terms of the flavor and aesthetic departments. The best part is that these all are very easy to prepare. This is great, particularly when you already have so many things to do for Halloween preparations.
5 Halloween Dessert Recipes For All Hallows Eve
Are you all set for a fun and crazy Halloween party? It’s time to consider making some of the following Halloween dessert recipes for your sweet-toothed guests and family members.
I. Spider Web Cake – Halloween Dessert Recipes
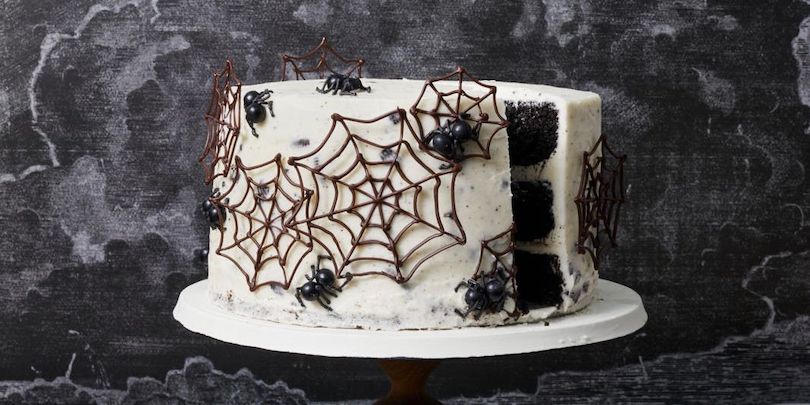
Want something unique but delicious? Try adding black cocoa powder for making this spooky dessert with a scary surprise insider it with a frosting of crushed Oreo cookies.
Ingredients the cake:
Oil, Two 3/4 cups of all-purpose flour, 1 cup black cocoa powder, 1 cup brown sugar, 1 cup granulated sugar, 2 tsp. baking powder, 3 large eggs, 1/4 tsp. kosher salt, 1 tsp. pure vanilla extract, 1 cup low-fat buttermilk, 3/4 cup neutral oil (such as canola), 1 tsp. pure vanilla extract, and 1 cup freshly brewed coffee.
Frosting ingredients:
Two 1/2 sticks unsalted butter, 1 tsp. Kosher salt, Five 1/2 cup confectioners’ sugar, black gel food coloring, 1/4 to 1/3 cup heavy cream, and four lightly crushed chocolate sandwich cookies.
Ingredients for spiders and webs:
4 oz. dark chocolate and black sixlets candies.
How to Make It
1. To prepare this recipe, you have to start with the heating oven to 325°F. Lightly oil the cake pans and line the bottom with parchment greased paper.
2. In a large bowl, put flour and cocoa powder together. Add baking powder, sugars, baking soda, and salt.
3. Add eggs, oil, buttermilk, and vanilla extract. And, whisk until all gets mixed well. Gradually, keep adding coffee while whisking until the mixture is smooth.
4. Divide the mixture among prepared pans and bake it. You have to bake it until you put the wooden pick in it and it comes out clean. It will take around 28 to 32 minutes to bake.
5. Transfer pans to your wire rack for 10 min and after that invert them onto the racks for complete cooking.
6. Once cook, wrap chilled cakes for at least 30 minutes or keep them for 1 day before beginning the decorations.
Make frosting
1. In a large bowl, beat butter, salt, and sugar with an electric stand mixer at low speed. Keep mixing until the mix is properly combined. Gradually, increase the speed to medium and further beat for 3 minutes.
2. For assembly, keep 1 cake on the cake board or serving platter. Now, spread 3/4 cup of frosting on the top of the cake and its edges.
3. Put the second layer of the cake on the top and repeat the process.
4. Also, add the last layer of the cake and coat the whole cake in a thin frosting layer. Once you apply the forsting properly, let the cake settle for 10 minutes or until the frosting isn’t tacky.
5. Transfer 1/2 cup of the leftover frosting to a tint black and small bowl. Further, transfer it to a piping bag with a small tip and keep it aside.
6. Spread a thick layer of frosting on the cake and use an offset spatula for making the surface smooth.
7. If frosting is still left, save it for sticking spiders and webs on the cake.
8. For making webs and spiders, draw or use the template of spiderweb and stick it on the work surface. Put the waxed paper on its top and tape it down from the corners. Keep two-thirds of the chocolate in a bowl and melt it in a microwave for 30 seconds.
Prepare piping bag
1. You have to begin with a large parchment paper and fold one corner over unless edges line up for making a triangle.
2. Cut off and eliminate the excess. With folded side facing you, take its bottom right corner for meeting the top of the triangle and curl the paper inward to properly line it up. Hold the points with one hand and use another hand for wrapping final points to meet together. Fold these points in the piping bag.
3. Fill the bag not over halfway with melted chocolate and further fold down the open side of the seal. Cut the small point of the bottom of the piping tip and trace the webs on the waxed paper. Let it set before you transfer it to the cake.
4. And, for making spiders, you have to make black pipe legs and Sixlets candies with black frosting. Also, let it sit nicely before you transfer it to the cake.
II. Halloween Cake Pops – Halloween Dessert Recipes
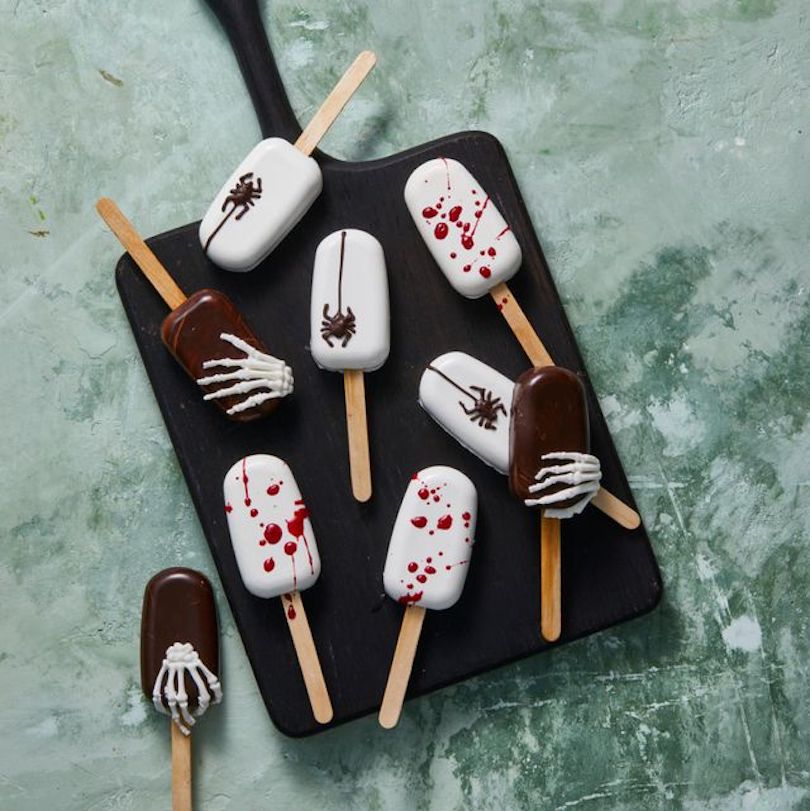
This is one of the easy-to-make Halloween dessert recipes that you can make easily on your own. It is basically the cake crumbs mixed with a frosting of buttercream and dipped in melted chocolate. This makes it is a very easy Halloween treat without any complex procedure.
Ingredients required for cake pops:
Two cups of cake crumbs, 1/2 cup buttercream or premade frosting, coconut oil, 1 1/2 lb. White candy melts or dark chocolate, wooden craft sticks, silicone cape pop molds, Corn syrup, fondant for decoration, and red gel food coloring.
Directions To Make
1. In a large bowl, mix frosting and cake crumbs.
2. For decoration:
a) You got to work in batches by melting 8 oz candy melts in a medium bowl. Also, add 1 tbsp coconut oil to it. Microwave at 50-percent power for 30 seconds or more until the mix melts.
b) Now, place around two-thirds of the chocolate in another bowl and put it in the microwave again at 50-percent power for 30 seconds until melted. Put the rest of the chocolate and stir until it melts completely.
c) Working one at a time, add 1 tbsp melted candy melts or chocolate into each pop. Use spoon’s back for evenly coating sides, while letting the excess evenly pool in the center.
d) Keep it in the refrigerator until it becomes firm (for about 5 minutes).
e) Push wooden craft sticks into the molds partially. Also, coat the side with candy melts or chocolate again. And, let it set.
f) Remove sticks:
Fill every pop with 1 tablespoon cake mix. There must be some gap between the mold’s top and then put sticks again in. Spoon over an extra 1 tablespoon of candy melts or melted chocolate. Use a small spatula for smoothing and scraping off excess. Further, refrigerate it until it sets firmly (for about 5 minutes). Gently remove every pop while pushing the stick through mold and again into the pop after removing completely. Repeat the process for mother pops, as well.
g) For blood:
Combine 1 tablespoon of corn syrup in a small bowl and also add a few drops of red gel food color. Keep cake pops on a big sheet of parchment paper. Also, use a wooden skewer for splattering onto the final cake pops.
h) For making skeleton hand:
You have to gentry dust silicone skeleton hand mold using cornstarch. Press fondant into the cavities and further take a small rolling pin for rolling it back and forth on the fondant. Keep doing it to ensure no excess material is there. Carefully remove fingers one at a time and use some melted chocolate on the cake pop.
i) For chocolate spiders:
You can make a piping bag. Using a large parchment paper and fold its one corner until add edges line up for making a triangle. After that, cut off and eliminate the excess. Keep folded side toward you and take the bottom right corner for meeting the top point of the triangle while curling paper inward to the lineup. Now, hold all points together with your hand and use another hand for wrapping the final point to meet all points. Fold all the pints into a piping bag.
j) Fill your bag, not more than halfway, with your melted chocolate:
Further fold-down open end for sealing. Cut the small point from the bottom of the piping tip and further pipe spiders directly on the pops.
III. Witch Cupcakes – Halloween Dessert Recipes
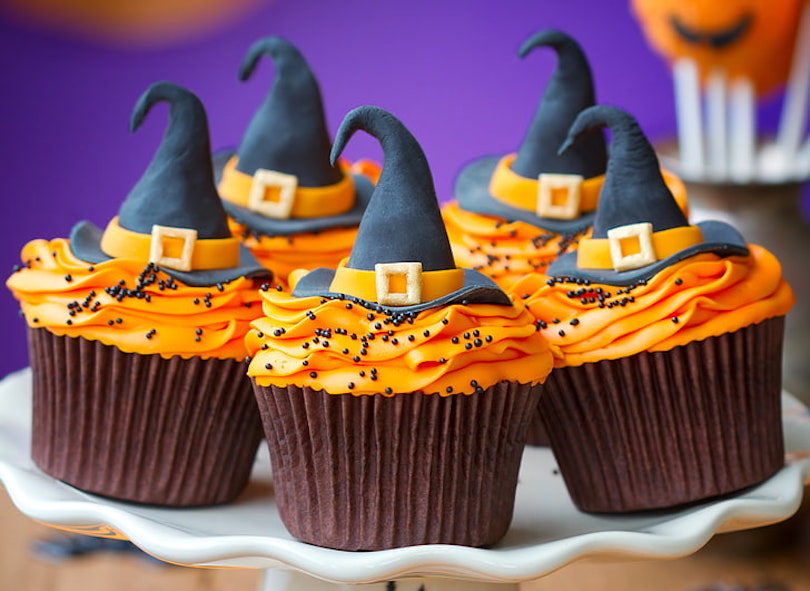
How about these witchy chocolate cupcakes? It is one of the quirky dessert recipes that come topped with crafty cupcake liners and frosting.
What Ingredients You Need:
Chocolate cupcakes, gel food coloring, vanilla buttercream, black cupcake liners, toothpicks, and double-sided tape.
Preparation:
1. Bake cupcakes and let them cool. Now, prepare buttercream and some tinted colors. Frost these cupcakes.
2. For making witch hats, you have to fold one cupcake liner in the half and again fold it in half. Tape two flaps for making a solid wedge shape and fold the wedge in half again. This way, you give a cone form.
3. Put a toothpick in the frosted cupcake and put the cone on the cupcake with the toothpick. It will form the top of the hat.
4. Make a hole in the center of the mini cupcake liner. It will form the base of this hat and repeat it for the rest of the cupcakes.
IV. Mummy Cupcakes
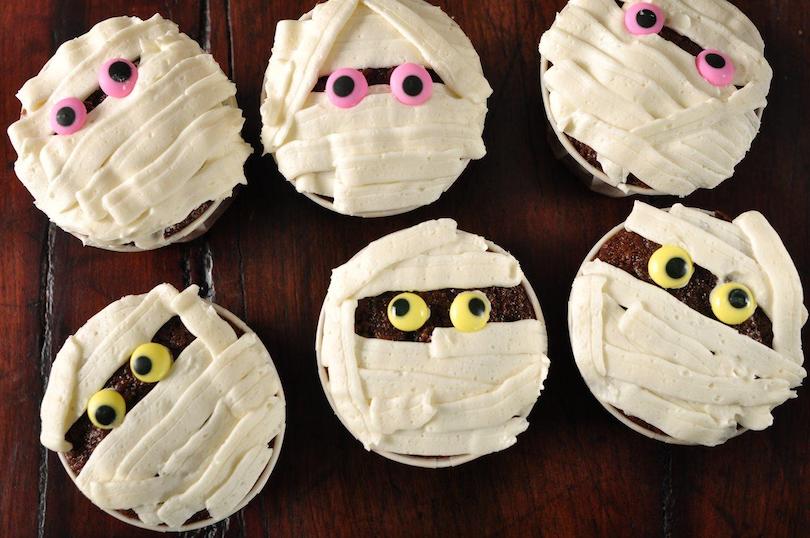
Have a look at these wrapped cupcakes. These are beautifully decorated with sweet vanilla cupcakes to form delicious.
Ingredients Needed:
Candy eyeballs, vanilla buttercream, chocolate cupcakes, and green and black gel food coloring.
Directions:
1. Bake cupcakes as per choice and let them cool.
2. Make buttercream and tint it green and black. After that, transfer to the piping bag that’s fitted with a ribbon tip.
3. Pipe buttercream for putting it back and forth on each cupcake. It will help you form perfect mummy wrapping. Finally, put two candy eyeballs on them.
V. Meringue Bones
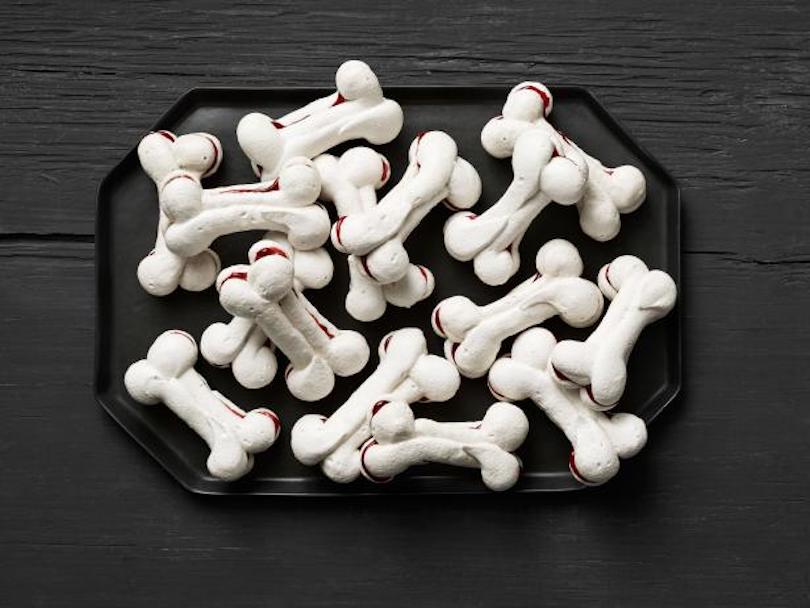
These are sweet, light, and scary-simple to make. The meringue bones may also act as your party decoration on the table while being a sugary treat after dinner.
What Ingredients You Need:
3 large egg whites, 1/2 cup sugar, 1/4 tsp. cream of tartar, and 1 tsp. pure vanilla extract.
How to Make:
1. Arrange oven racks in top and bottom thirds. Heat it to around 225°F.
2. Prepare a 6-inch bone template and finely trace it on two large parchment sheets. Meanwhile, you have to leave a 1-inch space on either side of the bones.
3. Line two large baking sheets with the paper and keep the stenciled side down.
4. Take a medium-size bowl and put egg whites in it and add a pinch of salt. Beat the mixer until it becomes foamy.
5. Add tartar cream and beat further at medium-high speeds until it becomes soft.
6. Add 1 tbsp. sugar one at a time and beat until meringue becomes stiff. Also, beat in vanilla extract.
7. Transfer the meringue to a big disposable piping bag and cut one end. Using stencils as your guide, make pipe bone shapes on the parchment paper.
8. Keep meringues in a pre-heated oven for 1 hour with the oven door closed. After that, remove them from the oven and cool them completely. You can store these cookies in airtight boxes at room temperature for up to two weeks.
So, these are some amazing Halloween dessert ideas to try this year. We’re sure both kids and grownups will get thrilled at seeing these sweet treats.
